
On the last SeedSigner related post we built the device from the ground up and did some testing to ensure it was all working as it should you can find that post here. On this post we will cover the process of generating the seed and creating a QR code in order to avoid having to enter the twelve seed words every time you use the device with this seed.
What we need:
- SeedSigner device
- Seed/QR template
- Bip39 seed words
- Marker for QR code transfer
First we will pick from a “HAT” eleven words from the BIP39 word list, this consists of an specific list of 2048 words and it is available in multiple languages, the list that I use is here the reason for using this one was for ease of formatting for printing as you can copy and paste the words on you favorite word processor and format to your liking to save on paper or make them easier to read for example. If you would like to learn more about this list you could also go here or simply search for “bip39 word list” using your favorite search engine.
Now we need to go ahead and copy the list from the link above and paste it on a word processor and print it and go thru the slow process (at least in my case) of cutting every single word out in order to be able to place them in a container “HAT” were they could be mixed and picked at random. If you have previously done the process we are discussing above for another wallet you can reuse those words and have saved yourself quiet a bit of time.

Select 11 random seed words:
After this painstaking process is completed we will go ahead and pick eleven random words and write them on the QR template provided by SeedSigner here for this guide we chose the 12 word seed instead of the 24, you could choose to go with either one the process is the same with the exception of selecting 24 word when prompted later on instead of 12 and downloading the 24 word template.

Calculate last seed word:
With the first eleven word selection completed we will need to use the SeedSigner device in order to generate the twelve and last word of our seed.
Once we are in SeedSigner menu we will need to select “Seed Tools”

Once in the seed tool menu we need to select “Calculate Last Word”

Next select “Use a 12 Word Seed” if you chose to do 24 word at this time you should select use a 24 word seed.

We now need to enter our 11 words in the order that we have them on the template, you will notice on the SeedSigner that as we start entering our letters words will start populating in the right side of the screen and that also the amount of letters available to you start to decrease based on the possible combinations for the words that are available.
- Once we see the word we are looking for use the upper key (KEY1) and lower key (KEY2) to the right on the device to navigate to the word and the center key (KEY2) to select it, after we have selected the first word the device will change to the next word and we will need to repeat the same process until we have imputed all 11 of our words.

- After the process above is completed the device will provide the 12 and final word.

- Write this word on our template, once the word has been written on our template click right and we will be presented with all 12 words in our seed please verify these are all correct.

QR Code creation:
– After verification of the seed words go ahead and click right and the QR code for our seed will be presented on the next steps we will work to transfer this QR code to our template.

Now we will transfer the QR code to our template in order to be able to scan it when creating a wallet or signing transactions in order to do this:
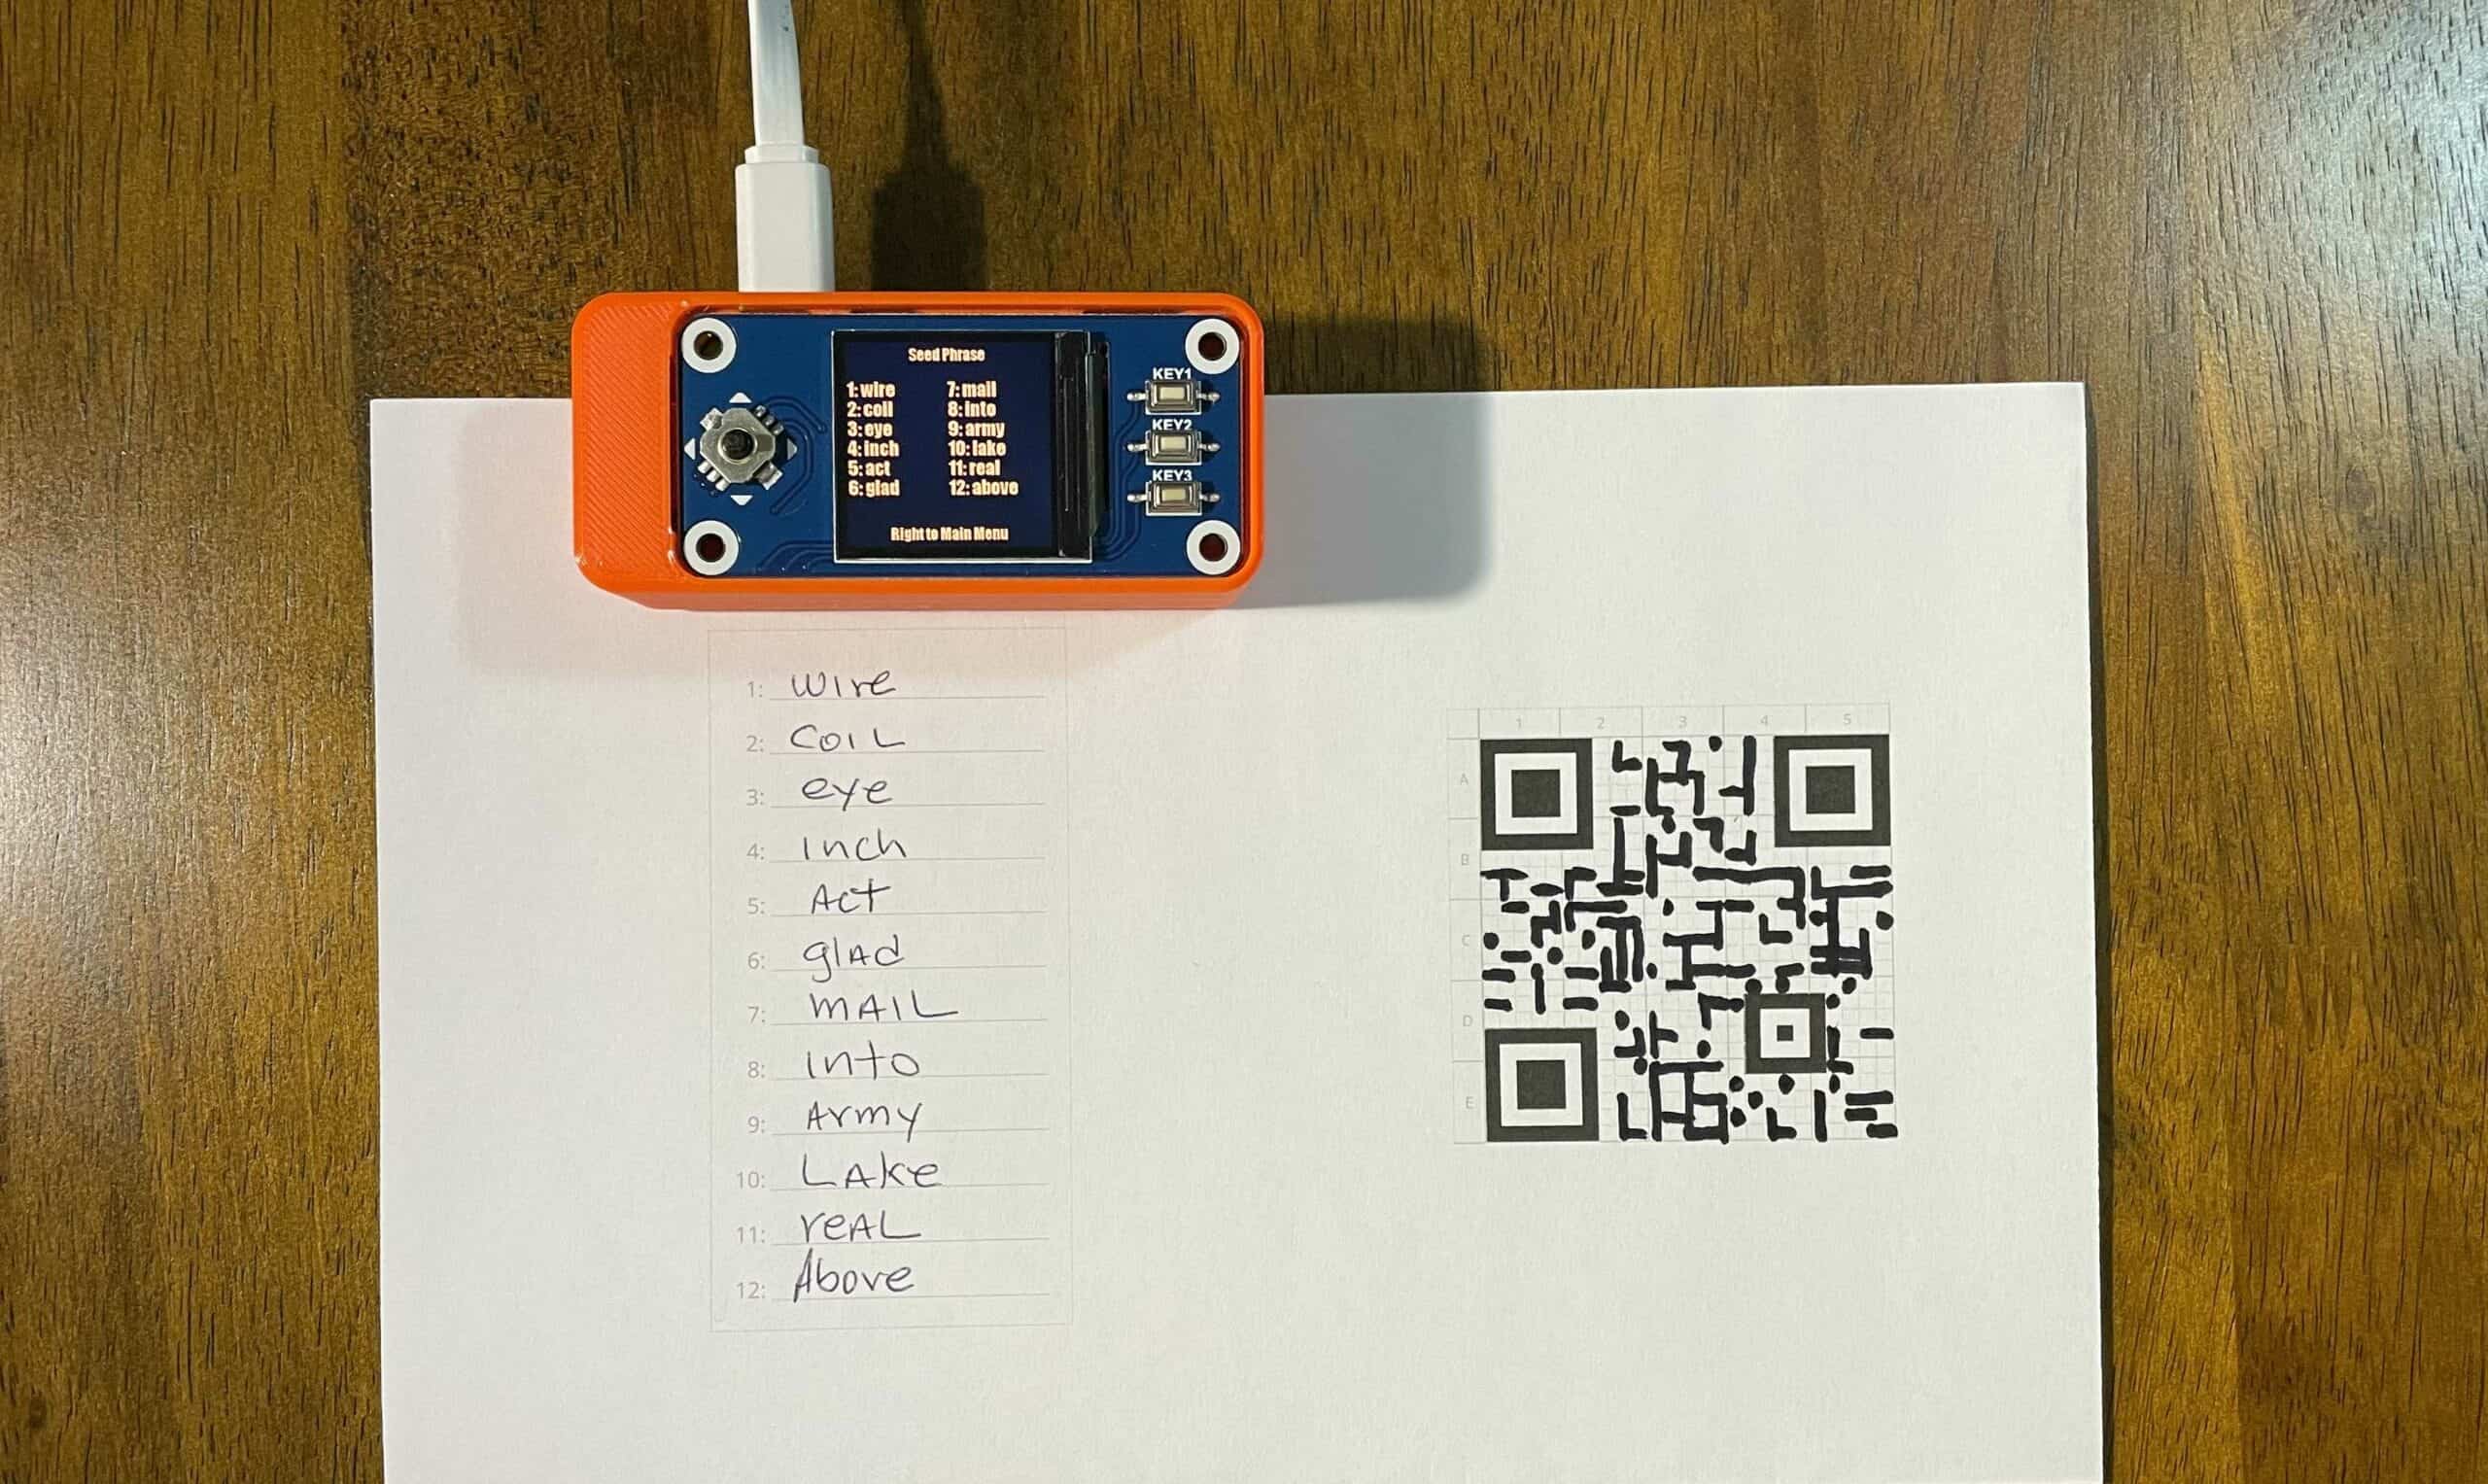
- Click to zoom into the QR code this will bring the grids of the QR codes one at a time and make it easier to transfer over, if you look closely at the QR code printed on the template you will notice that there is a grid divided into 5 sections (A, B, C, D, E) vertically and 5 sections (1, 2, 3, 4, 5) horizontally.

- On the first click to zoom we will get A-1 section of the grid there should be nothing to transfer over since this section of the QR has been pre-populated the same as the template QR, click right once again and it will show section A-2 of the grid in this section of the grid we will need to transfer the black sections over to the template, once this is completed you will click right and this will zoom into A-3 of the grid and we will follow the same process and so on util we reach A-5 then we click down and to the left till we get to B-1 and start the same process again. And we keep this off until you have covered all the grid and the QR is complete.

- The filling of the small squares does not need to be that precise I just did straight lines at the width of the marker i was using and on the single blocks just did a dot and on one of the lines i went half into the other square to see if it still get the right seed and it scan and provided the correct seed with no issues. In the picture below you can see an example of grid C5 in comparison between the SeedSigner and template.

Testing the seed QR:
Now that we have completed the transfer of the QR code to the template is time to test it to ensure it works and that it is actually holding the correct 12 word seed.
- To accomplish this we go to “Seed Tools” in the main menu.
- In the Seed Tools Menu select “Temp Seed Storage”

- In the Temp Seed Storage menu select “Use Seed Slot #1”

- From the Use Seed Slot #1 menu select “Scan a Seed QR Code”

- When you select Scan a Seed QR Code the camera will open at this time we need to point the camera towards our newly printed QR code, once the device reads the QR code You will get a “Valid Seed!” message.

- Now we click right an the device will display our 12 seed words, once again we should verify these, once verified click right and you should see a “Saved to Slot #1” message.

Congratulations with this we have concluded our seed generation and QR creation we can now create wallets and sign transactions using this seed, please if you plan to use this seed that we have just created for this purpose ensure to keep in a safe place away from prying eyes as anyone who gains access to the seed will have access to the funds stored using this seed.
Also remember that you can follow the same process that we just went thru to create additional seeds that could be used to create additional wallets etc and you can use all these wallets with one SeedSigner device.
On the next post we will use this seed to create wallets transactions etc, stay tuned.
If you would like to learn more about SeedSigner you can visit the project website https://seedsigner.com, this guide is based on a SeedSigner video you can find at https://www.youtube.com/watch?v=c1-PqTNx1vc.
Thank you for your time.